

Import from CSV/XLSX
Testomat.io allows you to import tests from CSV or XLSX files. This is useful if you are migrating from another Test Management System (TMS) or if you already have test cases documented in spreadsheets.
Supported Test Management Systems
Section titled “Supported Test Management Systems”Testomat.io supports importing test cases from many popular TMS tools. There are two ways to import:
- Direct Import via built-in integration
- CSV/XLSX Import supported for selected TMS formats
Supported For CSV/XLSX Import
Section titled “Supported For CSV/XLSX Import”Click any tool below to see step-by-step instructions:
Import from CSV/XLSX in Classical Projects
Section titled “Import from CSV/XLSX in Classical Projects”Import your tests to Testomat.io:
- Open your project.
- Go to the Tests tab.
- Click the (
...) menu. - Choose Import from other TMS.
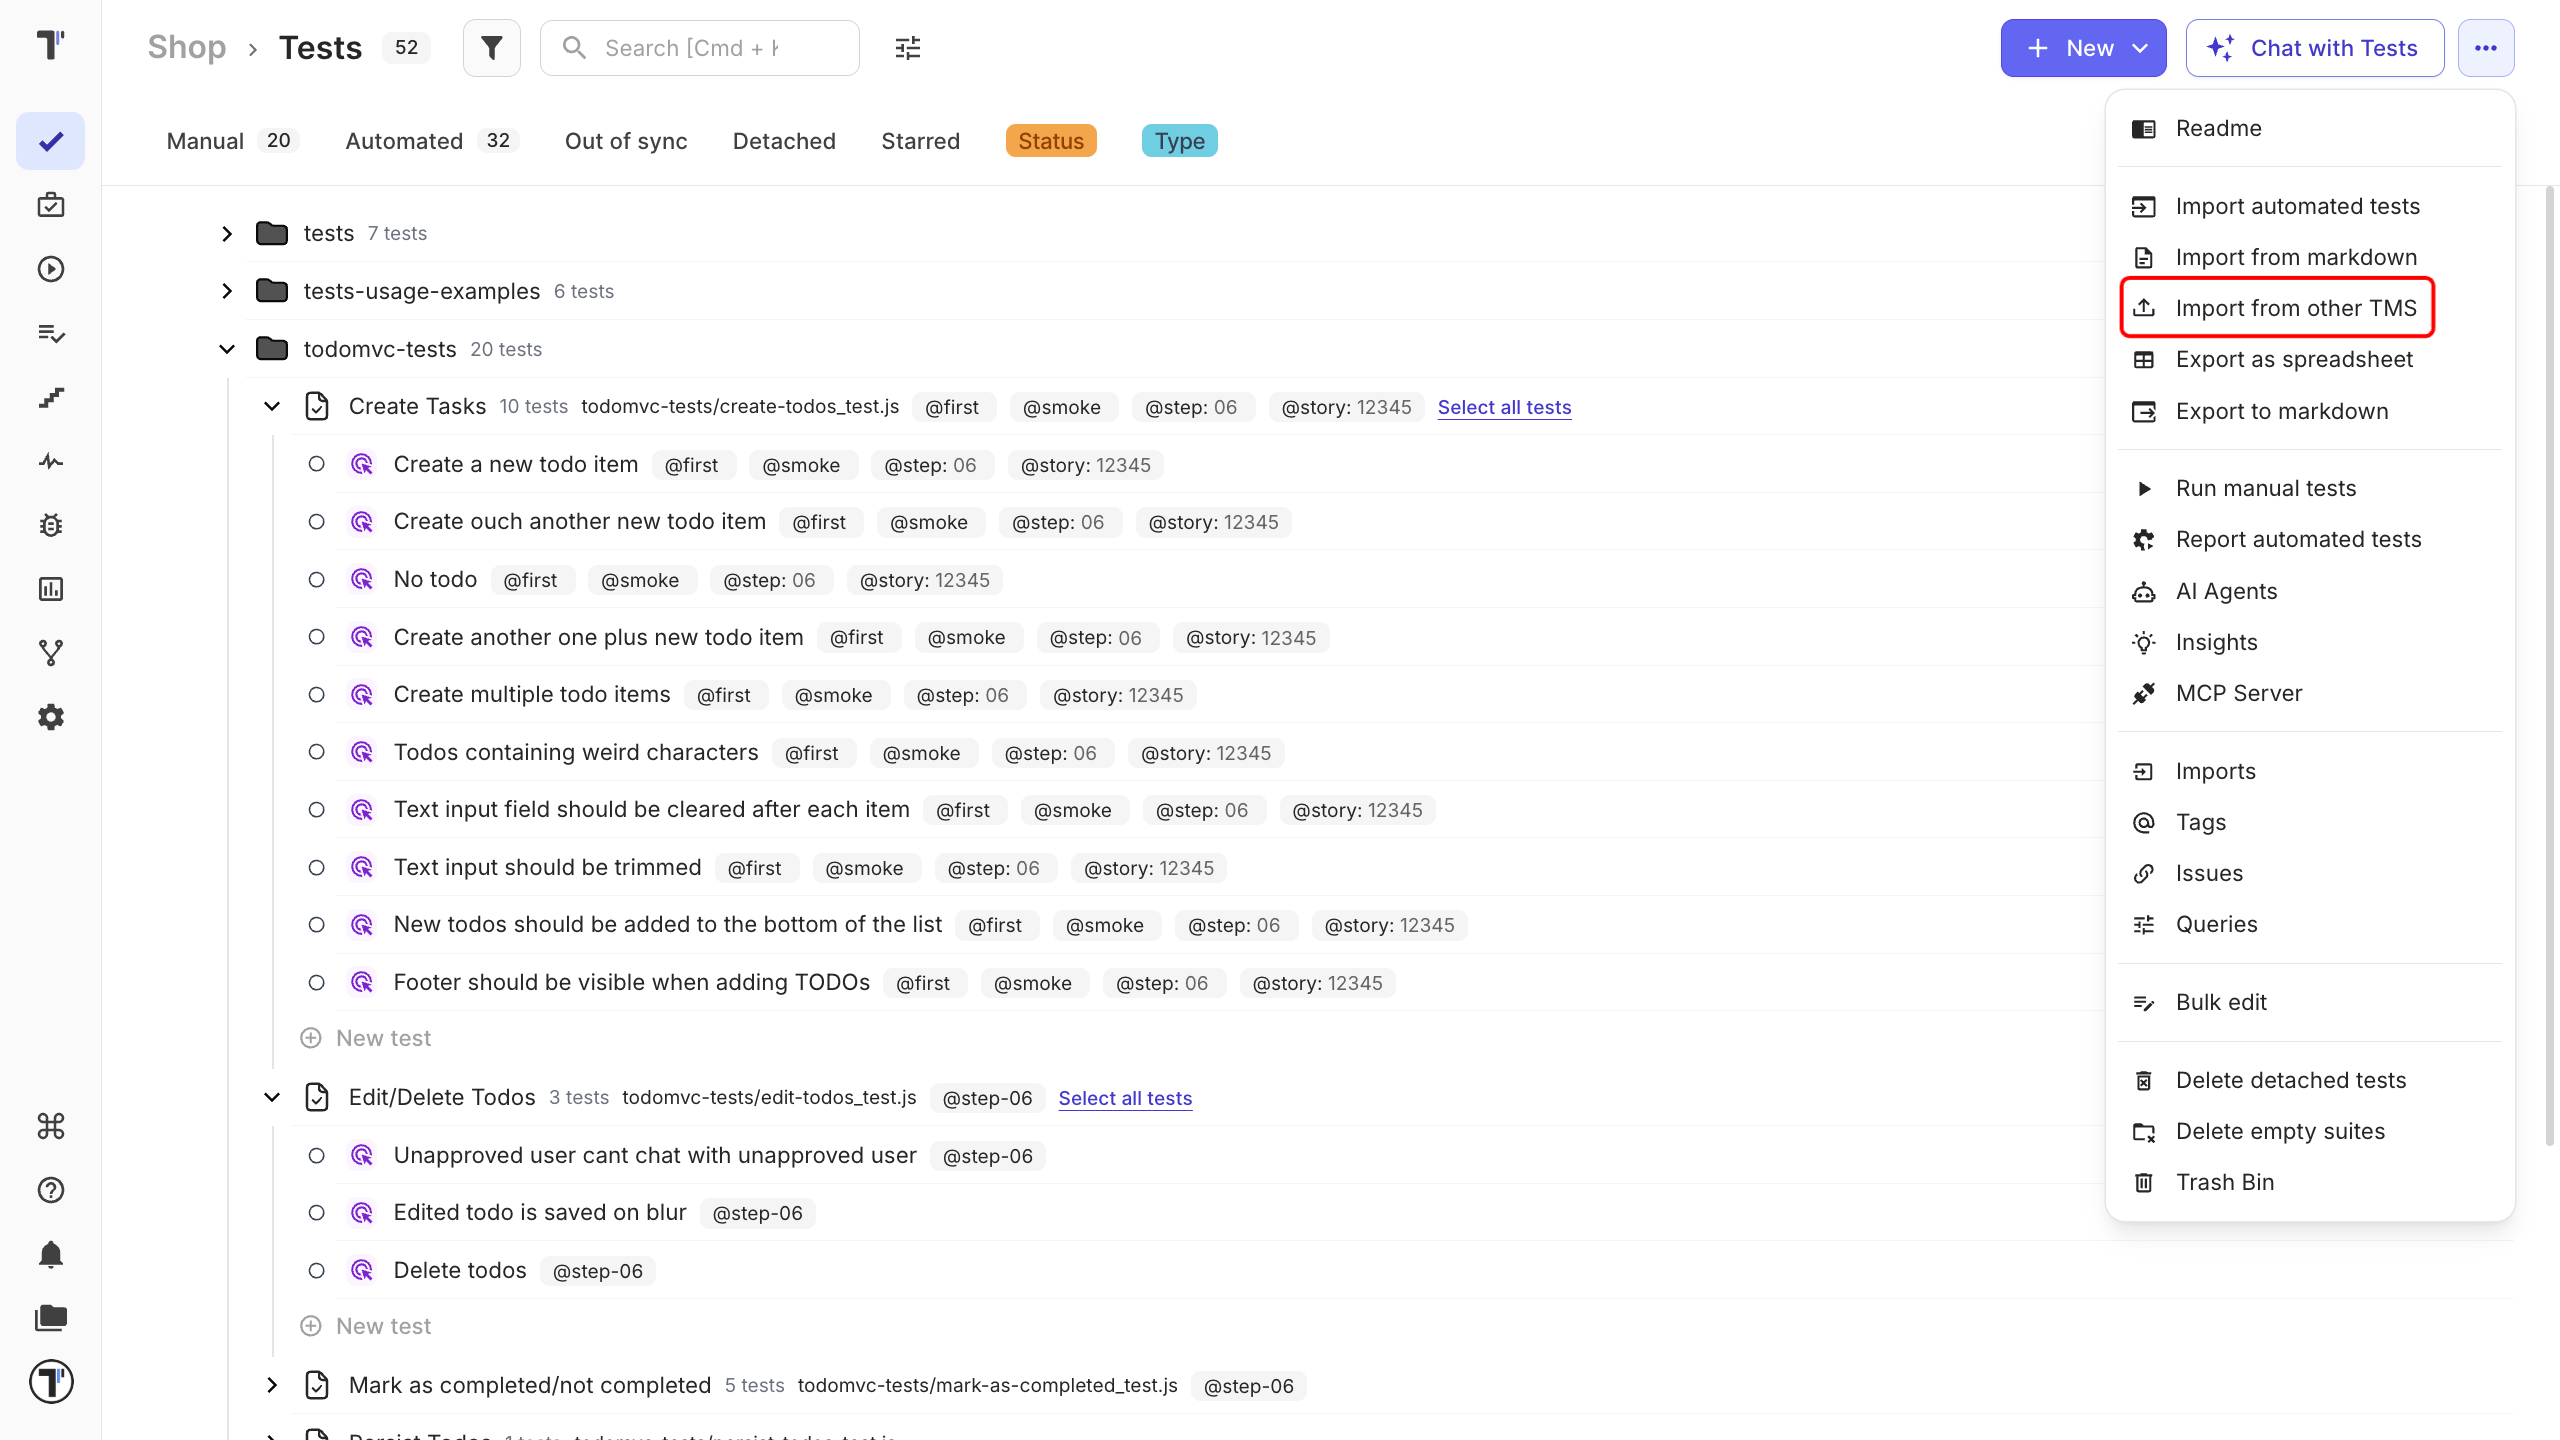
In the Imports window:
- Click Import.
- Choose Import from CSV. A sidebar opens on the right.
- Pick the tool your file came from, for example Qase.
- Click Choose file, select your CSV or XLSX.
- Click Create.
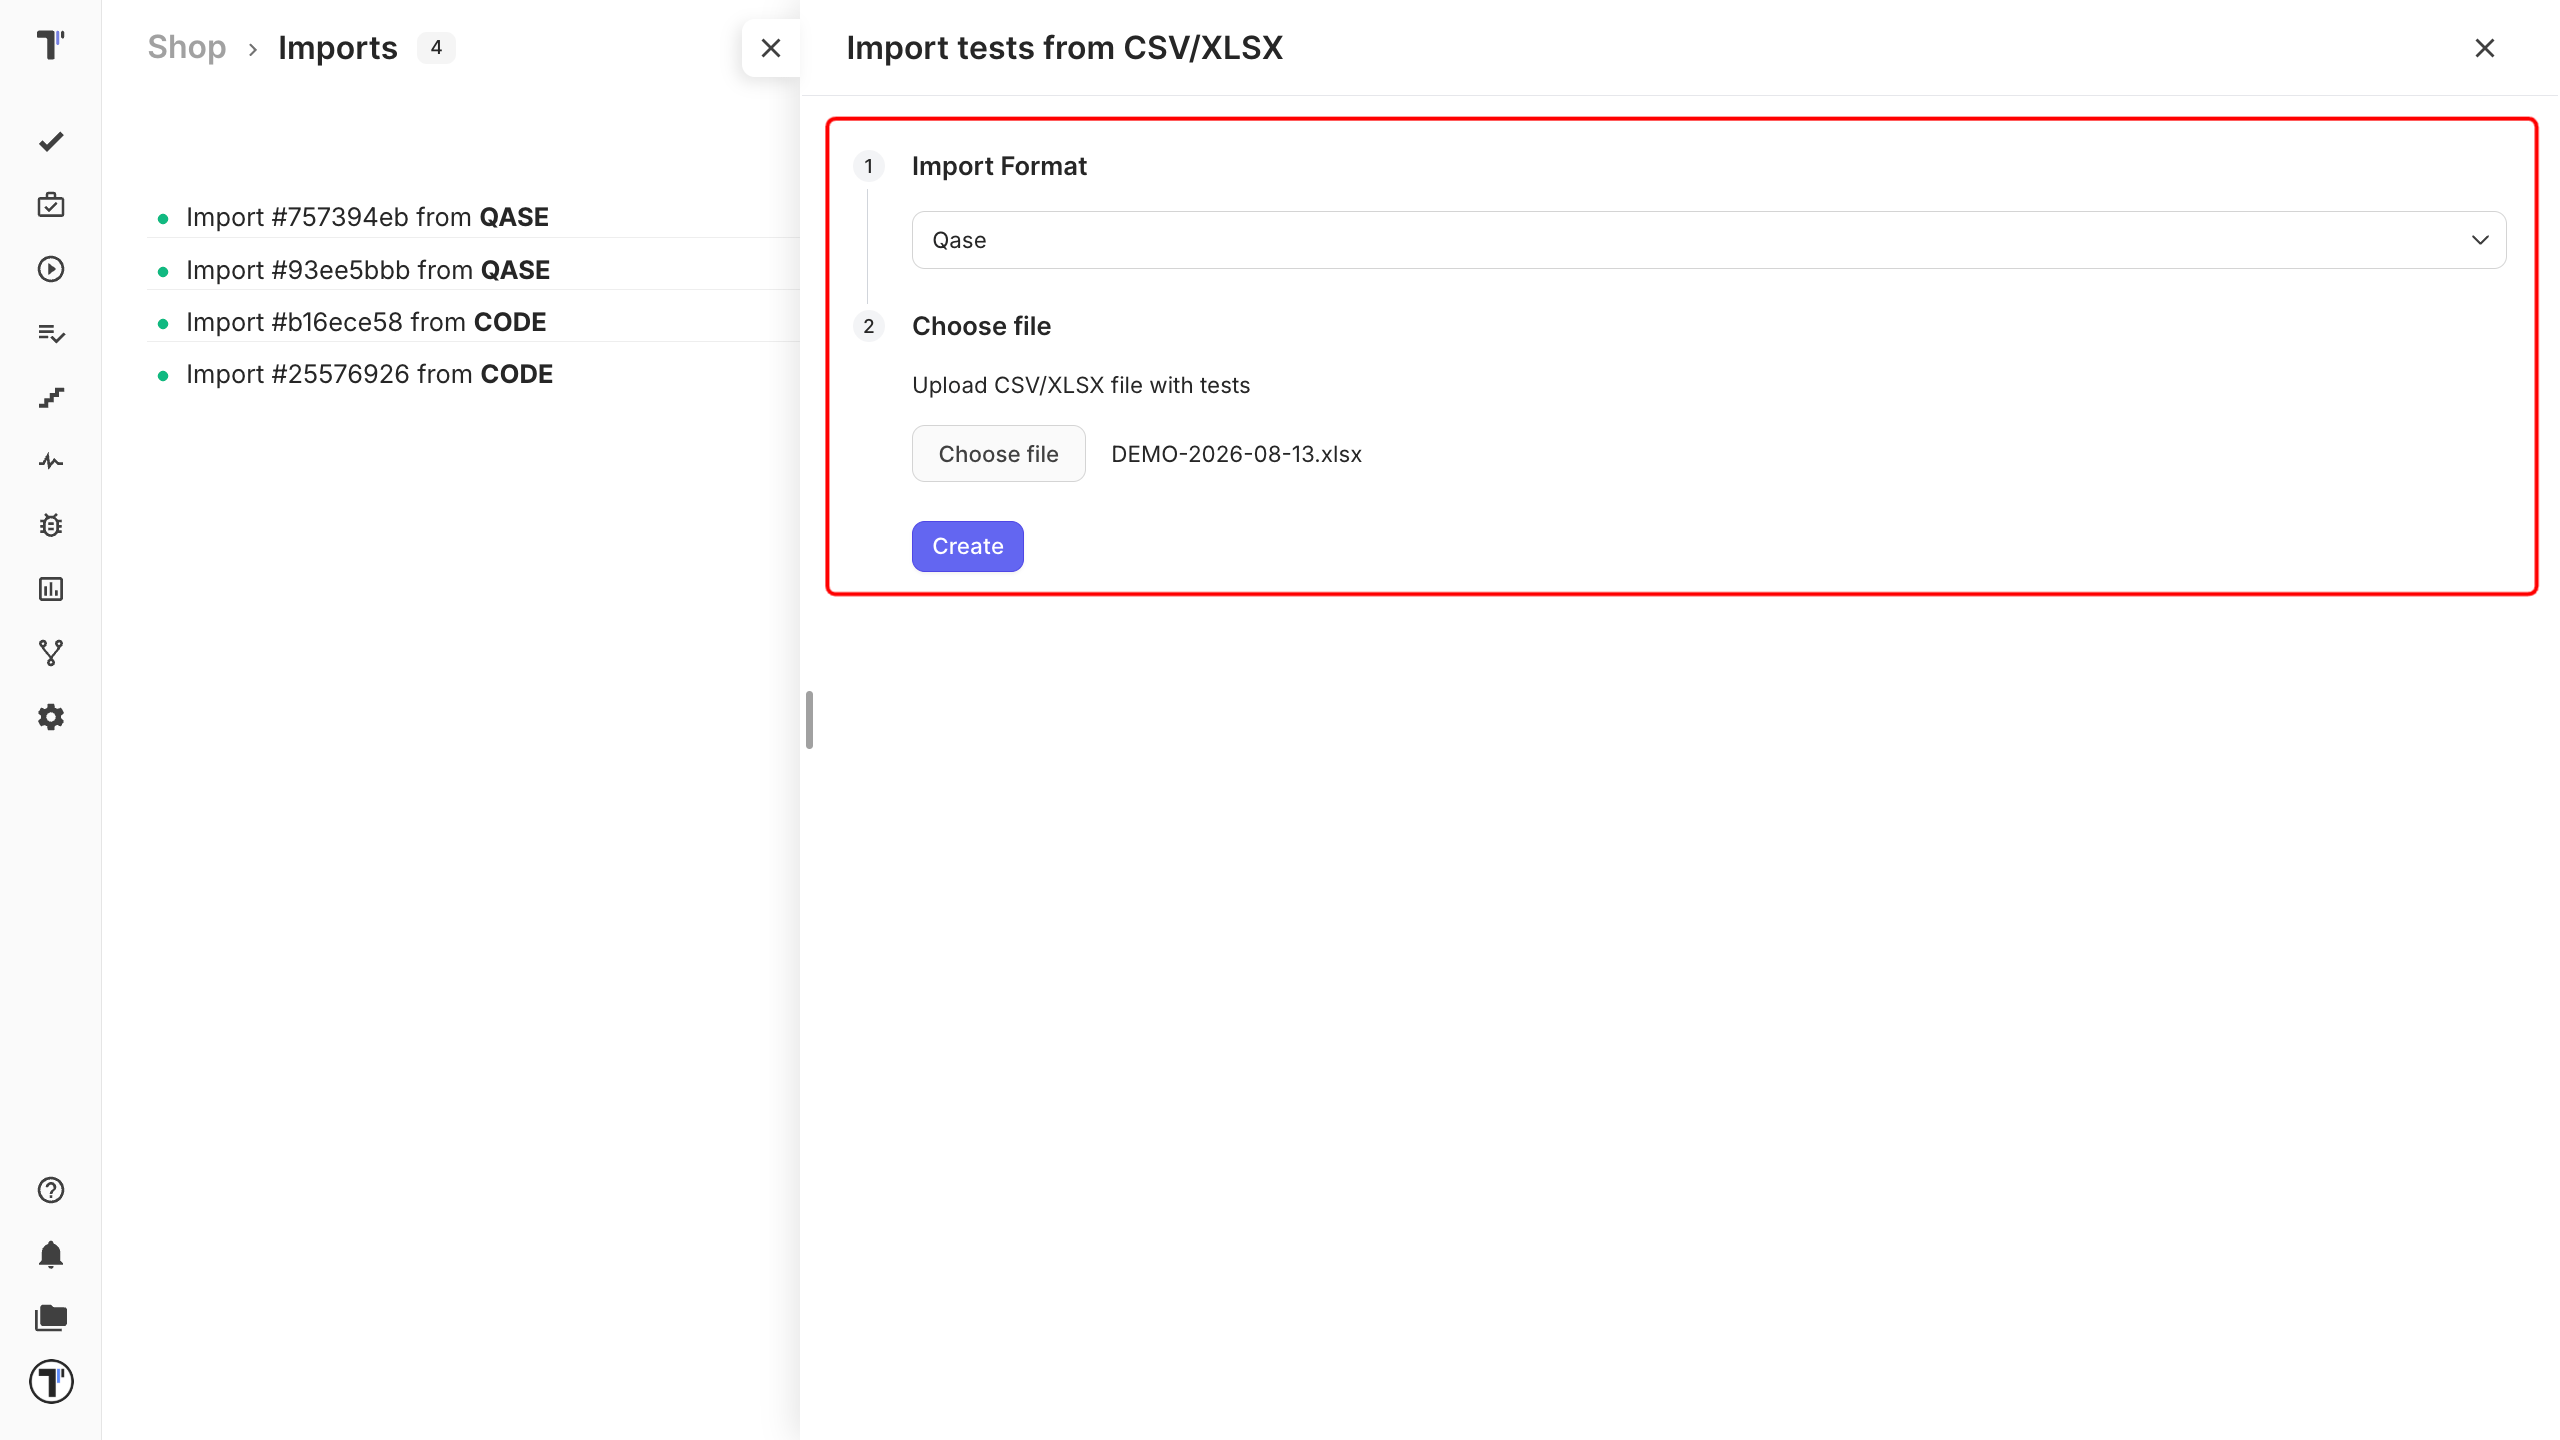
Testomat.io reads the file, and your tests appear on the Tests page.
Import from CSV/XLSX in BDD Projects
Section titled “Import from CSV/XLSX in BDD Projects”The process is the same as for the Classical Project.
- Open your project.
- Go to the Tests tab.
- Click the (
...) menu. - Choose Import from other TMS.
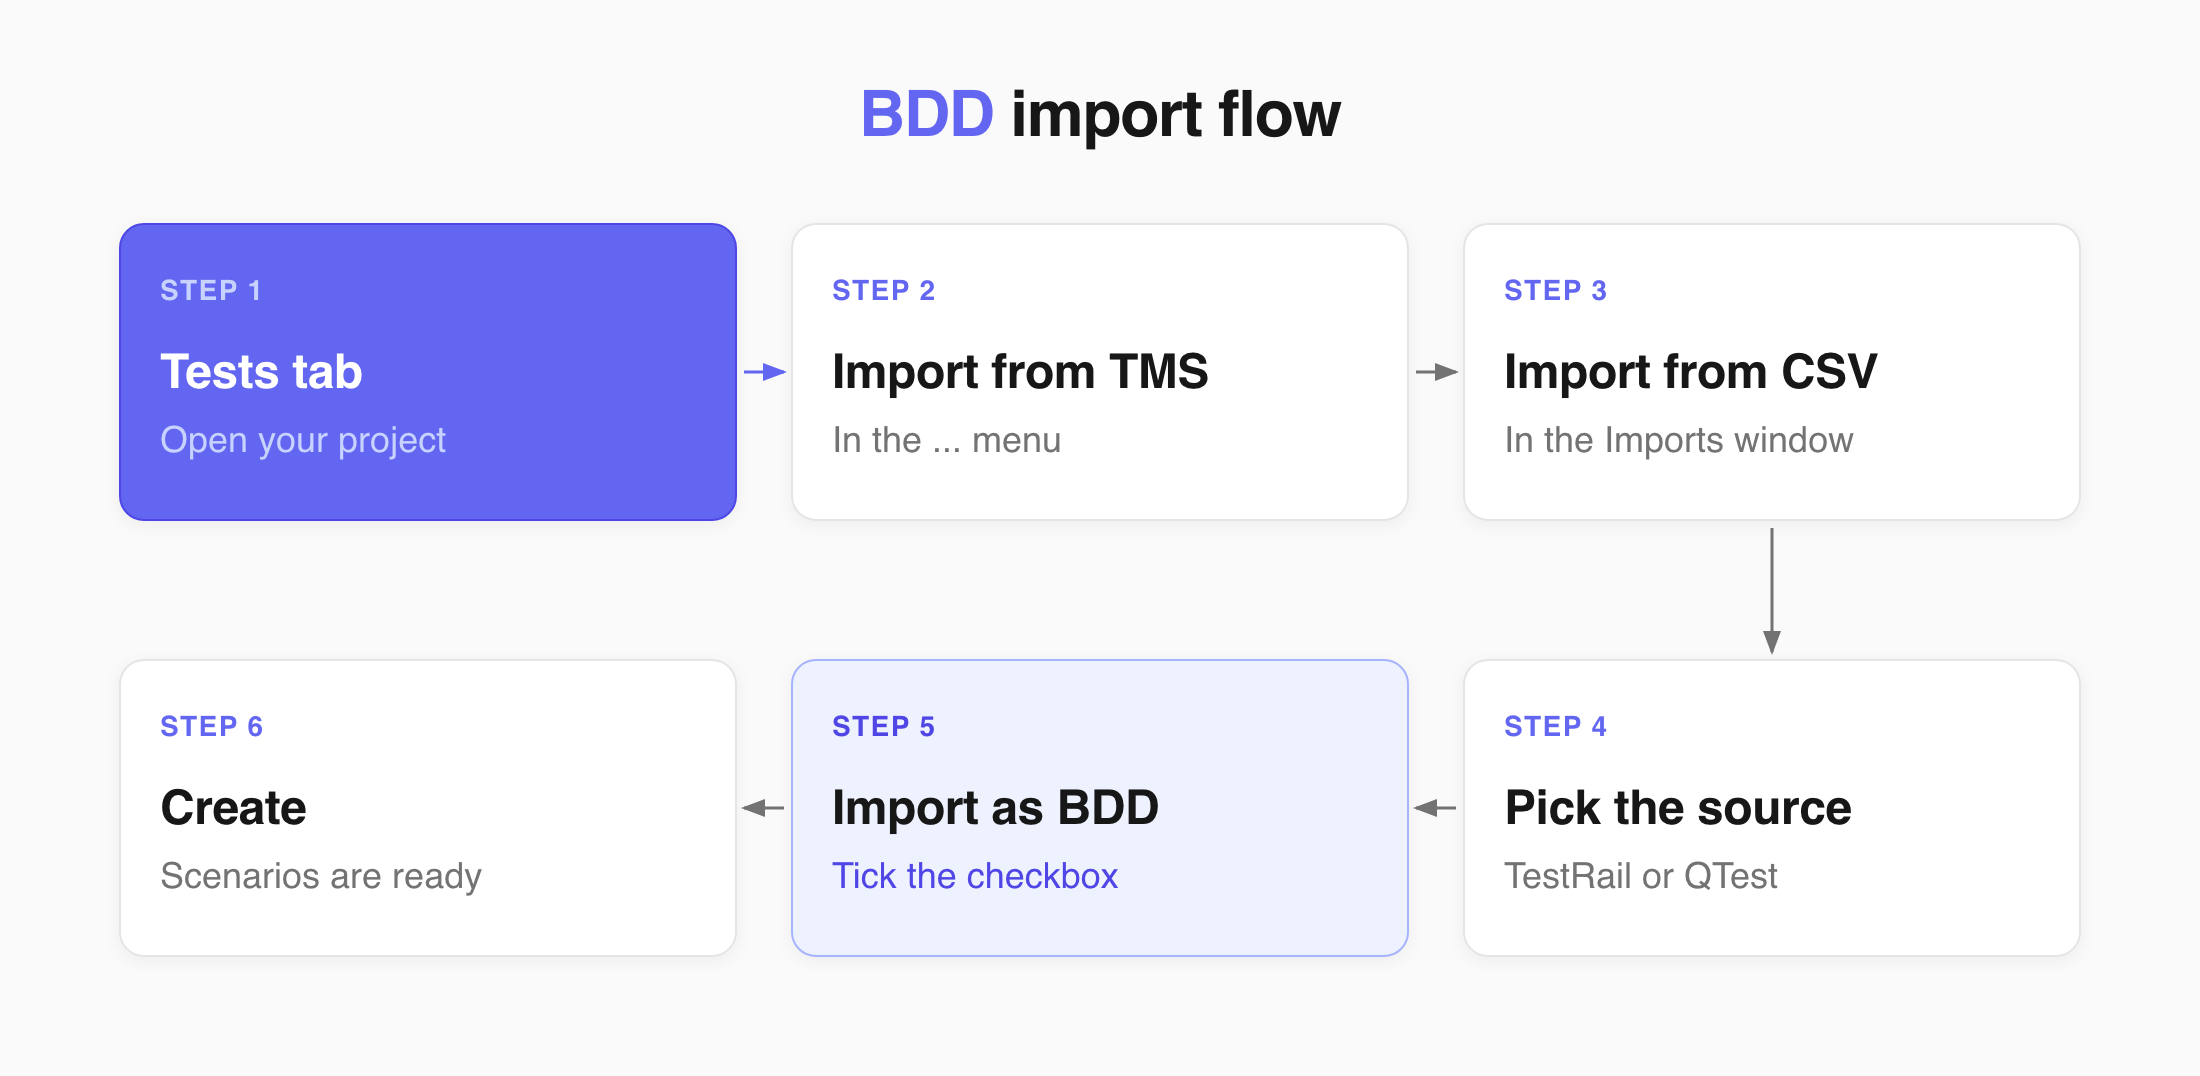
In the Imports window:
- Click Import.
- Choose Import from CSV.
- Pick the tool your file came from, for example Qase.
- Click Choose file, select your CSV or XLSX.
- Click Create.
When checked, all rows from the CSV/XLSX file are converted into BDD scenarios.
Mapping:
- Precondition = Given
- Step = When
- Expected Result = Then All imported tests are saved as feature files in your project.
Сreate Custom XLS for Testomat.io
Section titled “Сreate Custom XLS for Testomat.io”You can also create your own XLS file to import tests into Testomat.io:
| Column name | Content |
|---|---|
| ID | leave it empty |
| Title | put the title of your test here, one title per row |
| Status | goes for test type manual or automated, can be blank |
| Folder | enter the suite name here, and use /suite name/sub-suite name format to create suites nesting |
| Emoji | can be blank |
| Priority | you can set priority to your test normal, important, high, critical or low, can be blank |
| Tags | place here any tags you need, can be blank |
| Owner | name of test owner, can be blank |
| Description | put here the description of your test, Markdown format supported |
| Labels | place here labels and custom fields, can be blank |
| Issues | place here Jira key in format ABC-123 or other IMS keys, can pass multiple Jira keys separated by a comma, can be blank |
You can download the custom Testomat.io example file here.
Next steps
Section titled “Next steps”- Running Tests Manually - run the tests you just imported and record the results.
- Labels and Custom Fields - organize imported tests by severity, type, or any field your team uses.
- Import Tests From Source Code - have automated tests too? Connect them to the same project.